
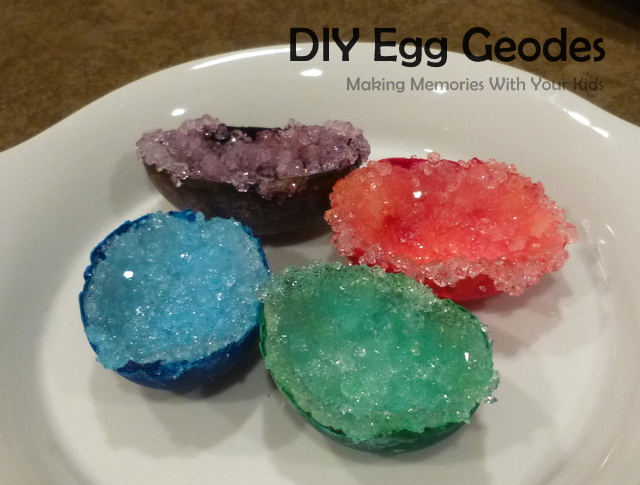
It’s been awhile since we’ve done a super cool science experiment so we were way past due. So when I saw this one on Facebook, it was a no-brainer. We had to try it out. Making your own geodes? How cool is that?!?! Steve Spangler has the coolest science ideas.
Don’t be intimidated by the ingredients or that they look like they must be hard to make. They are super easy! Trust me on that one.
You need this:
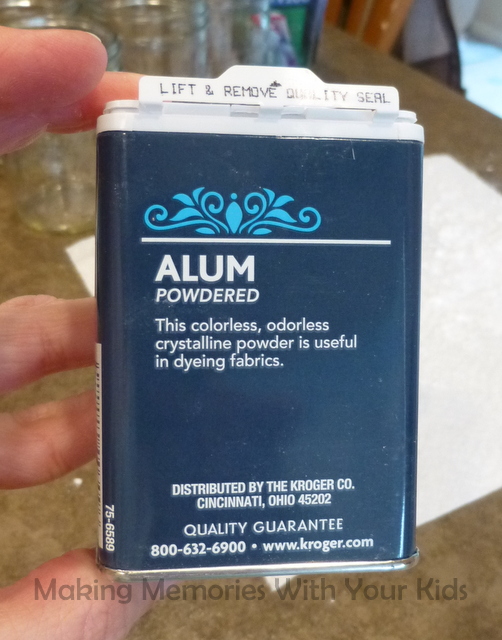
That’s the magic ingredient.
So here’s a visual on what you do…
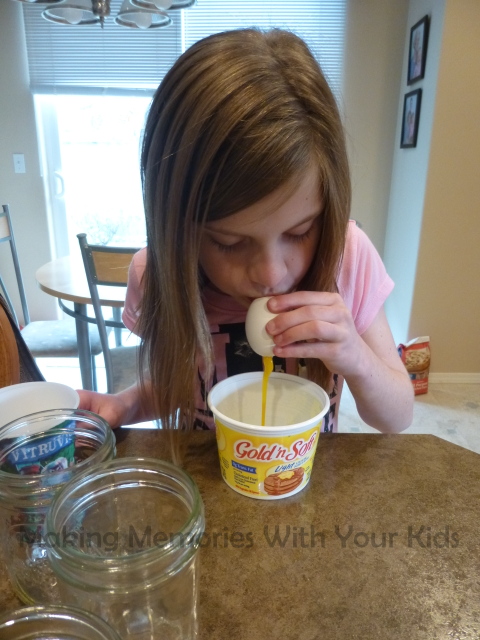
Blow your egg. (Ha. I can’t hardly write that without cracking up. Don’t blame me. I work in a middle school.) But seriously. Blow them.
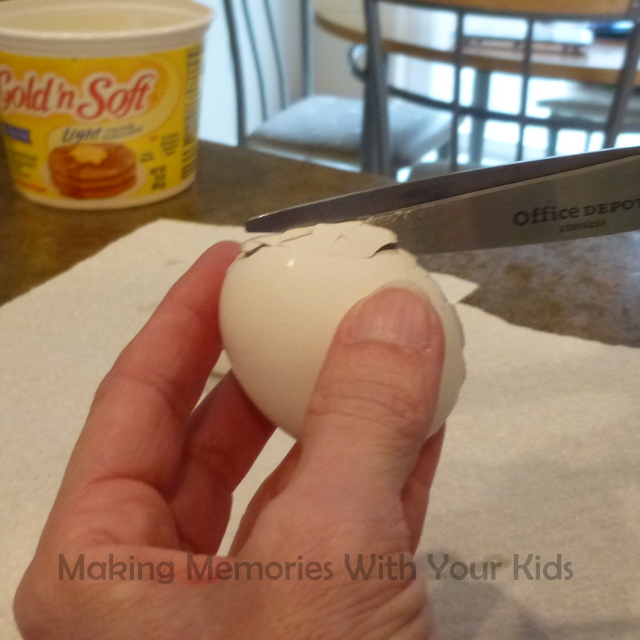
Carefully cut the egg in half with a pair of scissors.
See?

Gently wipe the egg to clean it off and paint on a layer of glue.
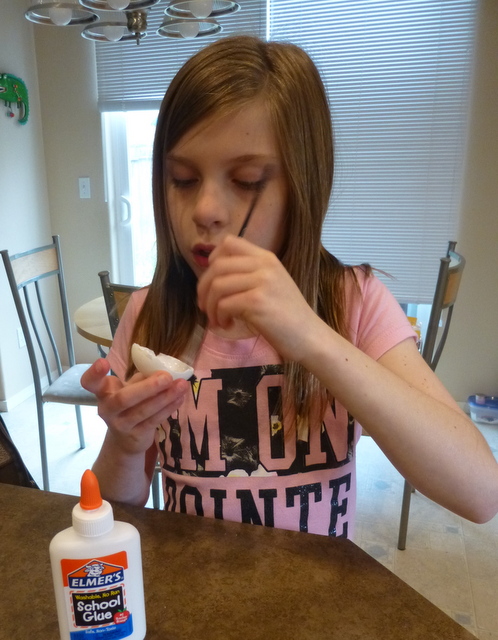
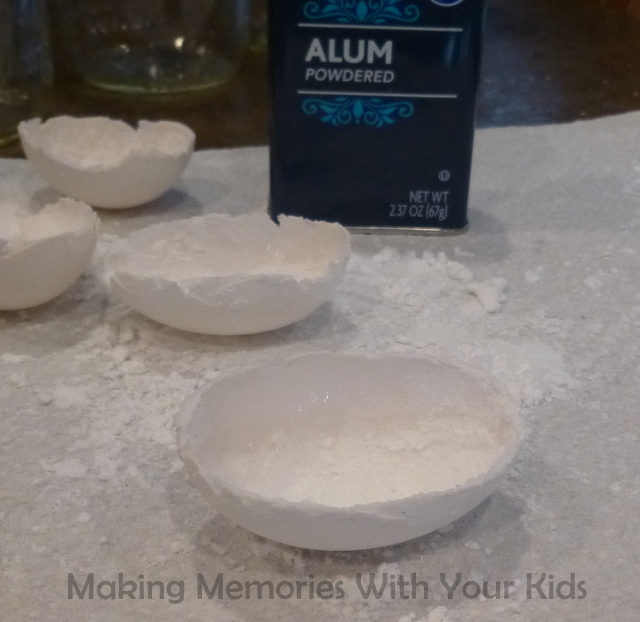
Pour the alum powder on the egg and let them sit until the glue dries.
After you make your solution, gently drop an egg into each jar and push them down to sink them.

Now, this is the hard part. Wait. Wait, and wait and tell your kids to stop looking at the jars. The longer the wait the better! Then, take them out and place them upseide down on a paper towel to let them dry.

Don’t they look cool so far?
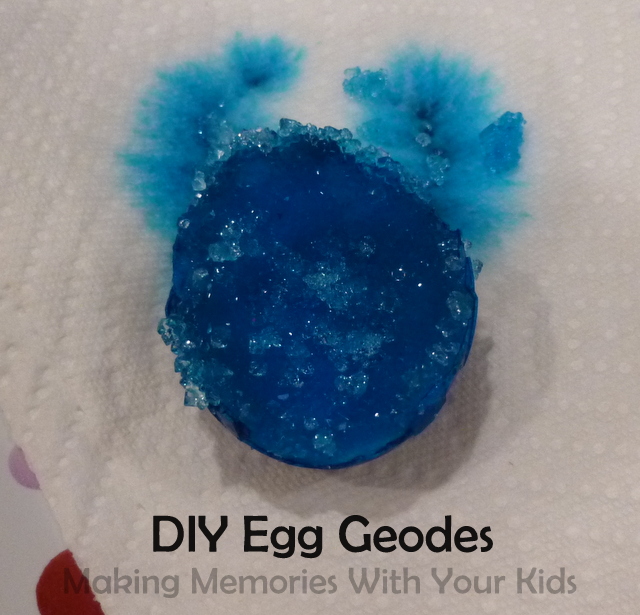
But look how cooler they look after they dry!

What you’ll need:
- Egg
- Paintbrush
- Glue
- Food coloring
- Alum powder (look in the spice section of your local grocers)
- Water
- Scissors
- Paper towels
- Bowl
- Beaker/glass
- Spoon
- Pushpin
Directions:
- Use a pushpin to carefully poke a hole in each end of the egg. Put your mouth on one end of the egg and blow the yolk out through the other hole.
-
carefully cut the shell in half, down the egg’s length, with a pair of scissors. If there are any small pieces around the edges, go ahead and pull them off.
- Carefully wipe out the inside of the egg with a paper towel. Get the interior surface of the egg as clean and dry as possible without cracking it.
- Drop a small amount of glue into the egg and use a paintbrush to spread it around. Try to cover the entire interior surface, all the way up to the edges, of the egg with glue. Add more glue if needed.
-
Quickly, before the glue dries, generously cover it with alum powder.
- Let sit until the glue has completely dried. Overnight is best!
-
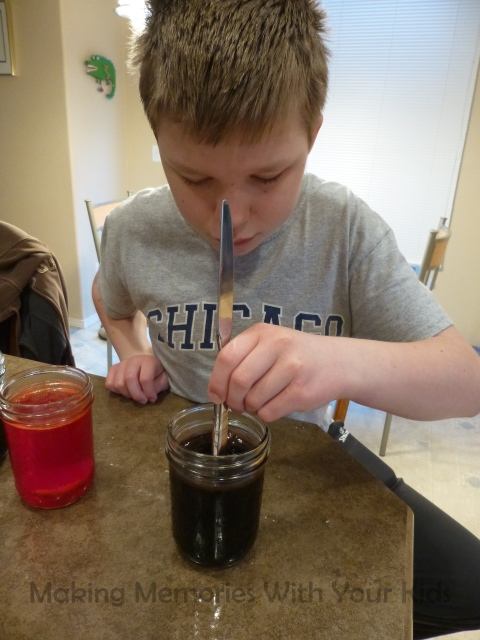
Bring two cups of water to the point where it is almost boiling. Pour the heated water into a jar or glass and stir 30-40 drops of food coloring and 3/4 cup of alum powder into the heated water.
-
Let the colored alum solution cool for around thirty minutes.
-
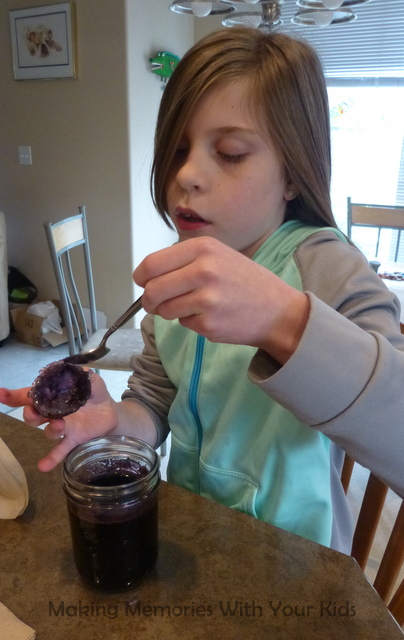
Once the colored alum solution has cooled, place the egg, opening up, into the solution. Push the egg to the bottom of the beaker with a spoon and allow the egg to sit in the solution for 12-15 hours.
-
After the 12-15 hours have passed, check out your egg. It’s grown crystals! Carefully remove the egg and place it on a paper towel or drying rack to finish the geode-creation process.
How cool is that?!?!


I’ve pinned this so I can find it when we get really bored this summer (about one week into the vacation!)
My Dad used to blow eggs–I never quite got the hang of it! This is a great and easy science experiment that all children and probably the adults will love!
My daughters would love doing this experiment. Especially my 6th grader. Thank you for sharing this cool idea.