Grab a Button

Previous Posts You Don’t Want To Miss
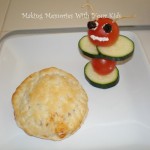
Alien Invasion… For Dinner???
The aliens are coming! The aliens are coming! I told you that I was going to make dinner time more fun and exciting. How fun is this idea?!?! My kids loved it! This idea came from the cookbook Just For Kids Collection. (If you missed my Octo-Dog post you MUST check it out here!) Here’s […]
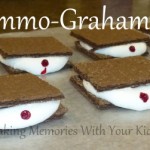
Mammo-grahams for Breast Cancer Awareness
I know today is November 1st and Breast Cancer Awareness month was October but I just had to share this one with you. Plus today is “Wear Pink” day at my school. So, of course I had to bring cookies to help celebrate! And not just any cookies… Mammo-graham cookies. Ha! Get it?! Mammo – […]
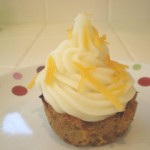
Meatloaf and Mashed Potato Cupcakes
Meatloaf and mashed potatoes are comfort food to me. I love them! My kids love them! And I love that my kids love them! But I wanted to kid it up a little. (We eat meatloaf a lot.) So I made my regular meatloaf. It’s nothing uber fancy. I buy the spice packet at the […]

Firecracker Floats
I haven’t done a single thing for the 4th of July =o( Where have I been??? We typically don’t do much for the 4th, though. It’s always been one of those holidays where I’m frustrated because of all the loud noises that keep waking my kids up! Does that make me grouchy? =o( But a […]
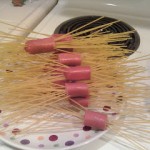
Making Dinner Time Fun
I saw this “recipe” in the Family Fun magazine while at the Doctor’s office and thought I’d give it a try. Anything to make dinner time fun, right? My kids LOVED it! And it was easy to make. I took hot dogs and cut them into 4 pieces. Then I took raw spaghetti noodles and […]
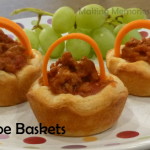
Sloppy Joe Baskets
We’re taking a little break from all of our holiday desserts to bring you a dinner idea. Crazy, right? Not so much if you know me. I just love making fun foods for my kids and with Easter coming up, I thought these Sloppy Joe Baskets would be fun to serve for dinner. They look […]

Spaghetti Tacos
Do your kids watch iCarly on Nickelodeon? My kids love it. One of the things that Spencer (one of the characters) makes is spaghetti tacos. My kids have been asking me to make them for some time but I just never did. They didn’t sound all that appetizing to me. Spaghetti in a taco shell? […]
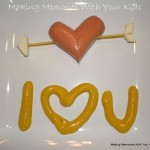
Puppy Love
I think I should just rename my blog “All the ideas I steal from Family Fun”. Seriously. Because whenever we get the magazine we all look through it and say “Oh, we have to make that!” about a million times. This was no exception. We had to make this, of course. I mean really… hot […]
Copyright © 2008 - 2025 Making Memories With Your Kids · Site Design by Jeni @ The Blog Maven



I love it! I’m so going to do this. Thanks!!!
Well that’s the most fun! I’m so filing it away for ‘soon.’
How do you get brown caulk for the chocolate frosting?
I made these before they are soo cool! I used white caulking and then I just spray painted the whole thing again so the white caulking turned brown.
Kristin – caulking comes in lots of different colors.
This is too fun! I have 14 grandkids all over the country. I love to send them ‘happy mail’! Great idea.
How did they handle transit through the USPS? We’re they still intact?
What a great idea! This is great Erin!
So cute! I love this! I thought it was real cake when I first looked at it. You are the best mom for doing all these great things with your kids:)
This is brilliant! I love your conversation at the post office! I bet the faces of the recipients were fabulous as well!
Those are super cute!! We’ve make sponge cakes for our play kitchen before 🙂 mmm yummy yummy cake 🙂
Thanks for sharing at Sharing Saturday!
great idea, and the result is very cute! Tina
This is SO SO cute! I love it and I’m sure the bday kid would too! You are a Featured Favorite this week on Saturday Show & Tell on Cheerios and Lattes! We loved having you join us last week and can’t wait to see what you have been up to this week! Have a great weekend!
Mackenzie 🙂
ok, I’m definitely making these. I wish I had thought of it.
you have such creative ideas…so glad you share them with us!
These are great! I have never thought to mail anything that wasn’rt in a envelope or a box. I love the Easter eggs. That would make a great card/gift. I am going to have to come up with something fun to mail to my sister. Love these!
an awesome ideal, everybody would love these
Nice idea. The chocolate one looks so real.
Wow it looks so real! Neat idea!
What a great idea. Thank you for sharing.
Kit3247(at)aol(dot)com
Wow, they look so real! I really thought they were pieces of very sponge-y cake! This is such a clever idea and would make for a real surprise to receive in the mail! The acrylic caulking really does look so much like frosting, it’s unbelievable! Thanks for sharing this excellent idea!
That is so cool I thought it was real cake and now im hungry..lol
Haha this is unique. My friends would love this. And I can imagine the look on every single mailman/woman when they think they just grabbed a real piece of cake from the outgoing stack =P
Wow, that is so cute and so funny! I had no idea you could put something like that in the mail.
Very coll idea, great way to spend time with the kids creating them and eating
What a cute idea, I love your crafts!
I so love this idea. I must try this!